Getting Started with Trezor Suite: A Beginner's Guide
Welcome to Trezor Suite! If you’re new to cryptocurrency and looking to manage your assets securely, Trezor Suite is the perfect tool to help you get started. Trezor, a well-known hardware wallet brand, offers this software suite to provide an easy-to-use, all-in-one solution for managing your crypto holdings. In this blog post, we’ll guide you through the basics of Trezor Suite and how to set it up for the first time.
What is Trezor Suite?
Trezor Suite is a desktop and web-based application that works seamlessly with Trezor hardware wallets (such as the Trezor Model One and Trezor Model T). It provides a user-friendly interface for managing your cryptocurrency assets, keeping them secure, and performing a wide range of functions, from checking balances to making transactions.
Why Use Trezor Suite?
If you’re serious about securing your cryptocurrency, a hardware wallet like Trezor is one of the safest options. Trezor Suite is the software that interacts with your hardware wallet, making it easier to track your crypto holdings, securely send and receive assets, and check transaction history—all without exposing your private keys online.
Getting Started with Trezor Suite
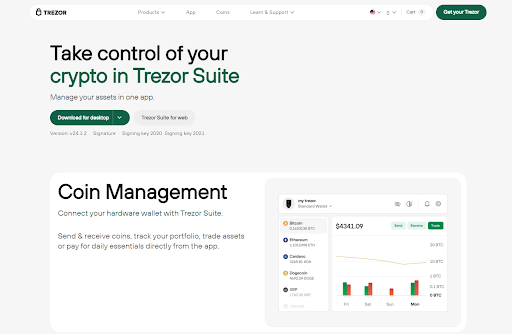
- Install Trezor Suite First, download and install Trezor Suite from the official website here. You can choose from versions for Windows, macOS, or Linux. Once installed, open the app to start setting up your Trezor wallet.
- Connect Your Trezor Device To get started, plug in your Trezor device via USB. The software will automatically detect your device. If it’s your first time using Trezor, you’ll be prompted to create a new wallet or restore an existing one. If you’re starting fresh, simply follow the on-screen instructions to create a new wallet and back up your recovery seed. The recovery seed is a critical backup of your wallet, so make sure to store it in a safe place.
- Add Cryptocurrency Accounts Once your wallet is set up, you can add accounts for various cryptocurrencies like Bitcoin (BTC), Ethereum (ETH), or others. Trezor Suite supports a wide range of cryptocurrencies, so you’ll have flexibility in managing your portfolio.
- Send and Receive Crypto Trezor Suite makes it easy to send and receive cryptocurrency. To receive funds, simply select the "Receive" tab, choose the currency you want to receive, and share your address with the sender. When sending crypto, navigate to the "Send" tab, enter the recipient’s address, specify the amount, and confirm the transaction using your Trezor device.
- Track Portfolio and Transactions The dashboard of Trezor Suite provides a detailed overview of your portfolio. You can see the balances of your cryptocurrencies, track recent transactions, and monitor prices in real-time. This makes it easy to stay on top of your holdings.
Security First
The primary reason for using a Trezor hardware wallet, and by extension Trezor Suite, is security. Your private keys remain offline, making it much harder for hackers to access your funds. Trezor Suite adds an additional layer of protection by providing features like PIN codes and passphrase options, ensuring that your crypto is safe.
Conclusion
Trezor Suite is an excellent starting point for any new crypto user. It’s simple, secure, and offers all the tools you need to manage your digital assets. Whether you're sending crypto, checking your portfolio, or securing your wallet, Trezor Suite provides a streamlined experience that ensures you’re always in control of your funds. So, get started with Trezor Suite today and enjoy the peace of mind that comes with using one of the most secure wallets in the industry. Happy crypto journey!
Made in Typedream